Easy Rainbow Popsicles: A Taste of Summer Delight
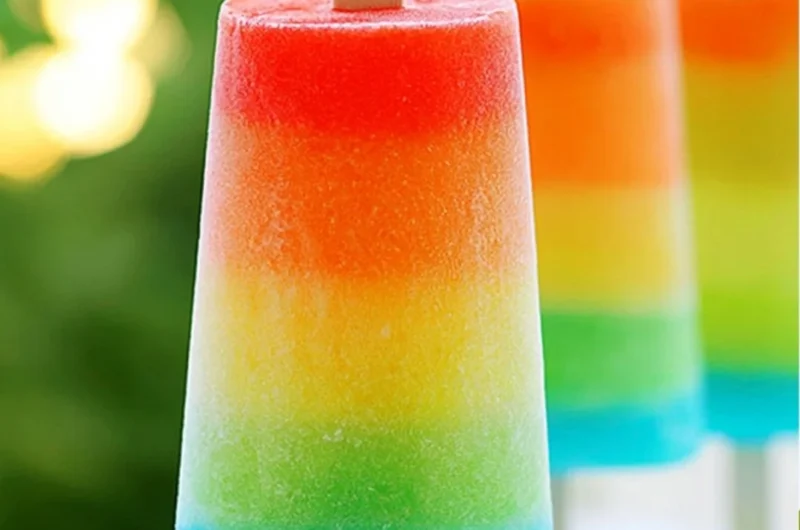
As the golden sun sets on another beautiful summer day, the air fills with warmth and laughter. Nothing quite says "summer" like a chilled treat on a hot day, especially when it’s as colorful and vibrant as these Easy Rainbow Popsicles. This delightful recipe takes me back to my childhood, where I would sit on the porch, watching my little sister struggle to maintain the balance of her multi-layered popsicle, her giggles punctuating the afternoon air. The sweet and tangy bursts of fruit juice swimming with creamy yogurt or coconut milk take me back, celebrating simple pleasures and the joy of the season.
Perfect for a sunny afternoon or as a cool, refreshing dessert at your next gathering, these popsicles are not only visually stunning but also pack a punch of flavor. You’ll want to save this one for your easy summer dessert board on Pinterest!
Why You’ll Love This Recipe
- Bright and Beautiful: These rainbow popsicles are as cheerful to look at as they are to eat. Their vibrant layers are sure to impress family and friends.
- Customizable Flavors: Use any fruit juice or sliced fruits you love, allowing for endless flavor combinations!
- Healthy and Wholesome: Packed with vitamins and probiotics (in yogurt), these pops provide a nourishing treat that everyone can enjoy.
- Super Easy to Make: Just blend, layer, freeze, and you’ve got a delicious summer snack in no time!
- Fun for the Whole Family: Kids will love helping to create their own colorful layers, making it a fun activity to bond over during those sunny days.
Gather These Simple Ingredients
- 1 cup fruit juice (e.g., orange, apple, grape)
- 1 cup yogurt or coconut milk
- Sliced fruits (e.g., strawberries, kiwis, blueberries)
- Sweetener to taste (optional)
Let’s Make It Together
- In a blender, mix the fruit juice with any sweetener if desired until thoroughly blended.
- Pour a layer of fruit juice into popsicle molds and freeze for about 30-60 minutes until slightly set.
- Add a thin layer of yogurt or coconut milk on top of the juice layer, creating that creamy texture.
- Add a generous layer of your chosen sliced fruits, providing a delightful bite when frozen.
- Repeat the layers of juice, yogurt, and fruits until the molds are full, creating a stunning rainbow effect.
- Insert popsicle sticks into the center of each mold and freeze for several hours or until completely solid.
- To serve, run the molds under warm water for a few seconds to release the popsicles effortlessly.
Fun Ways to Customize It
- Tropical Twist: Switch the juice to pineapple and layer with mangoes and shredded coconut for a dreamy beach flavor!
- Berry Blast: Use a mix of berry juices (like mixed berry or raspberry) and add fresh blueberries, strawberries, and blackberries for a zesty explosion.
- Peachy Keen: Blend peach juice with sliced peaches, topped with a dash of cinnamon yogurt for a cozy, comforting flavor.
- Minty Fresh: Add fresh mint leaves to the juice blend for an extra refreshing popsicle that’s perfect for those hot days!
Chef Emma’s Helpful Tips
- Make-Ahead Advice: These popsicles can be made a few days in advance and stored in the freezer, making them a perfect treat for unplanned playdates or sudden cravings!
- Ingredient Swaps: If you’re out of yogurt or coconut milk, feel free to use any dairy or non-dairy alternative, like almond milk or even Greek yogurt for a protein boost.
- Slicing Tricks: To get the perfect slices of fruit, use a sharp knife and make sure your fruits are ripe for easy cutting.
- Storage Suggestions: If making in bulk, consider wrapping individual popsicles in wax paper before storing them in a zip-top bag to prevent sticking.
What’s Inside – Nutrition Breakdown
- Serving Size: 1 popsicle
- Calories: 80
- Carbs: 15g
- Sugar: 10g
- Fat: 2g
- Protein: 2g
- Sodium: 10mg
Frequently Asked Questions
Can I make this ahead?
Absolutely! These popsicles can be made days in advance and stored in your freezer until you’re ready to enjoy them.
Can I use different ingredients?
Of course! Feel free to mix and match juices and fruits based on your preference or what’s in season.
How do I store leftovers?
After freezing, wrap the popsicles in wax paper and store them in a zip-top bag to keep them fresh and prevent sticking.
How long does it last?
When properly stored in the freezer, these popsicles can last up to a month, although they’re usually devoured long before that!
A Cozy Closing Note
These Easy Rainbow Popsicles not only revive nostalgic memories of carefree summer days but also provide a wholesome treat that you can create at home. They are a joyful project that you can share with loved ones, encouraging creativity and flavor exploration. So grab your favorite fruits, unleash your inner child, and have fun creating these colorful delights in your kitchen!
Save this Easy Rainbow Popsicles recipe to your dessert ideas board, so it’s ready when you need a cozy treat! Happy layering, friends!
Print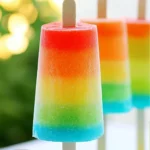
Easy Rainbow Popsicles
- Total Time: 240 minutes
- Yield: 8 servings 1x
- Diet: Vegetarian
Description
Bright and colorful summer treat made from layers of fruit juice, yogurt, and sliced fruits.
Ingredients
- 1 cup fruit juice (e.g., orange, apple, grape)
- 1 cup yogurt or coconut milk
- Sliced fruits (e.g., strawberries, kiwis, blueberries)
- Sweetener to taste (optional)
Instructions
- In a blender, mix the fruit juice with any sweetener if desired until thoroughly blended.
- Pour a layer of fruit juice into popsicle molds and freeze for about 30-60 minutes until slightly set.
- Add a thin layer of yogurt or coconut milk on top of the juice layer, creating that creamy texture.
- Add a generous layer of your chosen sliced fruits, providing a delightful bite when frozen.
- Repeat the layers of juice, yogurt, and fruits until the molds are full, creating a stunning rainbow effect.
- Insert popsicle sticks into the center of each mold and freeze for several hours or until completely solid.
- To serve, run the molds under warm water for a few seconds to release the popsicles effortlessly.
Notes
These popsicles can be made a few days in advance and stored in the freezer. Wrap individual popsicles in wax paper before storing in a zip-top bag to prevent sticking.
- Prep Time: 15 minutes
- Cook Time: 0 minutes
- Category: Dessert
- Method: Freezing
- Cuisine: American
Nutrition
- Serving Size: 1 popsicle
- Calories: 80
- Sugar: 10g
- Sodium: 10mg
- Fat: 2g
- Saturated Fat: 1g
- Unsaturated Fat: 1g
- Trans Fat: 0g
- Carbohydrates: 15g
- Fiber: 0g
- Protein: 2g
- Cholesterol: 5mg